
International travel can be a lot of fun when done right. But it can require a bit of meticulous planning and preparation.
One of the first prerequisites for international travel is a passport.
Typically, to get a passport, you need to gather all of the necessary documentation, go to one place to get your picture taken, and then go to another place to apply for your passport. After that, you have to wait six weeks to even receive the physical passport.
You can cut down on this running around by learning how to take your own passport photo.
Whether it is to renew your old passport or register for a new passport, learning to take your own passport photograph is a skill worth having. If you’re wondering how to take your own passport photo, this article is for you. In the next five minutes, learn how to take your passport photo.
How to take your passport photo – the advantages
- It saves time
- It saves you an extra trip to a photo studio
- It prevents unnecessary physical contact with others
- It saves money you would otherwise spend on a professional
- There’s no limitation on the number of attempts
- Fewer chances of a photo being rejected because it is “too dark” or “too bright”
How to take your passport photo – 8 steps
Taking your own passport photo is just as easy as taking a selfie. Here are eight steps to follow:
1. Select the right background
How to take your own passport photo at home? The first step is to choose the right background. When taking your own passport photo at home, make sure you stand in front of a spotless white background. You can achieve this by standing in front of a white wall while taking the photo.
In case you don’t have a white wall, you can use a white sheet to cover a section of a wall, and pose in front of that. You can even tape whiteboards, or sheets of white paper on the walls to make the background neat.
2. Position the camera
There are two ways to get your passport photo taken at home. Either get a friend or family member to hold the camera in front of you and take a front portrait, or do it yourself using a tripod and timer. Passport photos cannot be selfies, so place the camera in front of you while taking the photo.
Don’t position the camera too far away from yourself. Try to take a close-up shot of your face and shoulders. According to standard rules, the size of the subject’s head must measure 1 – 1 3/8 inches (25-35 millimeters) from the bottom of the chin to the top of the head.
3. Check the lighting
Passport photos need to be clear, and show your full face with no face covering or accessories that hide facial features. When choosing a neutral background, ensure that the spot has good lighting. A combination of natural light and artificial lights usually used at home can work effectively.
To avoid shadows, make sure you don’t stand in direct sunlight. In low-light conditions, using the camera flash can also give effective results without casting shadows.
4. Prepare yourself
In the process of how to do your own passport photo, make sure to follow this checklist:
- Passport photos need to be within six months from the time that you are using them. so there is parity between your current look and the way you look in the photo.
- Remove any face coverings such as masks, or items that conceal the hairline, such as caps (unless worn daily for religious purposes).
- Make sure all your facial features are clearly visible, and not hidden by hair or head coverings.
- Maintain a neutral expression.
- Keep hair neatly combed, tied back, and trimmed or tucked behind your ears.
- Remove any eyewear, including spectacles. Only glasses that can never be removed due to medical purposes are allowed.
- Wear regular clothing while dressing for your passport photo. Don’t wear uniforms or display symbolism, other than religious items that are worn daily.
- Remove headphones and other electronic devices.
- Check if your current lighting or headgear (if any) is casting shadows on your face.
5. Resize your image
Once you have taken the photo, the next step is to resize the image. Check the specifications for passport photos in your country and resize the image using resizing software. Passport photo size in most countries, like the United States is 2×2 inches (5×5 centimeters) in dimension.
You can easily find software to resize the image according to the required specifications. If you are new at this, here is a list of image resizing software that you can access.
- 123PassportPhoto.com
- MyPassportPhotos.com
- Target passport photos
- ePassportPhoto.com
- idPhotoforyou.com
- Walmart passport photos
- Oddprints.com
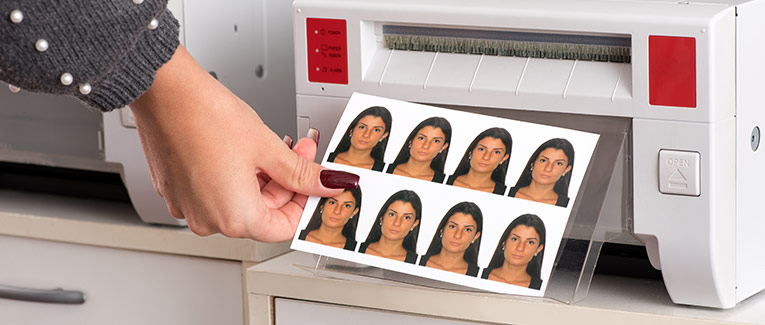
6. Check photo quality
Once you have resized the image, you can get it printed out in color at a local print shop, or do it at home with a color printer and photo paper. While printing the photo, make sure the photo is neither grainy nor pixelated. Black-and-white images are not allowed, so make sure to use only color photos for your passport.
Once the photo is snapped, no digital enhancements or edits are allowed. This means that you cannot change the background of a passport photo once it’s clicked. Additionally, you cannot edit facial features, so don’t try to use any filters or editing software to enhance your passport photo, as these will be rejected. Finally, make sure the images are not damaged, creased, faded, or perforated in any way.
7. Using the photo
Once you have taken and printed your photos, you can start using them for your passport. In case of passport renewal reapplications through the mail, make sure to use four staple pins to firmly affix the photo in the required column of your renewal form.
Make sure to put the staples in the slots that are already marked on your application forms. Then, in the case of a new application, the photo can be taken directly to a passport office for acceptance.
8. Use mobile apps
Let’s discuss how to take a passport photo with your phone. If you are unable to figure out the resources that you need to figure out how to take your own photo at home, here are a few other mobile apps that you can use:
- The U.S. State Department has a free online tool to help those applying for an American passport to crop and resize images in the correct proportions.
- Other tools, like PassportPhotoBooth, are explicitly designed to help users with taking passport photos at home. The app, which can also be used from iOS or Android devices, shows users the exact location within a frame where you should pose to get the right photo. The app also allows you to save or email the images for free, and they even print them for you for a nominal charge.
- Passport Photo AiD is yet another app that works for Android and iOS devices. One of the advantages of this app is that it allows users to pick older photos from their camera roll. The app runs the images through its algorithms to determine if it is in compliance with standard passport photo rules, and then makes the necessary changes, such as the background, to make the photo usable for the passport.
How to take your passport photos – an important DIY skill to have
We hope we have answered your question, “How to take my own passport photo?” With new and infectious diseases making physical contact unfeasible, DIY skills have become very important. Now that you know how to take your passport photo, it’ll only benefit you. After all, why spend money on something you can do on your own?
In the unfortunate case that you lose your passport while traveling, you could benefit from having travel insurance in place before you leave home. Travel insurance can help replace stolen or lost items, or at least offer reimbursement for them. Compare and review different travel insurance policies on Insubuy. The website makes it easy to see the different coverages offered by each plan, and allows you to make a purchase with one easy click.
