
Before you can take a U.S. non-immigrant visa appointment, you will need to pay the appropriate fees and obtain a Visa Fee Receipt from the bank. Either the applicant can go in person or can send a representative on their behalf. You can make the payment for the U.S. visa application fee in cash at any of the branches of Axis Bank or Citibank in India.
The fee is payable in cash only. Demand Drafts (DD), Bank Transfer Checks, credit cards, or personal checks are not accepted.
Travel Agents / Bulk Applicants / Bearer payments cannot make a payment by cash. Look at bulk payment using NEFT instead.
Procedure
- Create a Profile
Follow steps 1 through 10, as mentioned in scheduling a USA visa appointment. - After that, on the “Payment Confirmation Screen”, click on the link “Click Here For All Payment Options”. A new window will open.
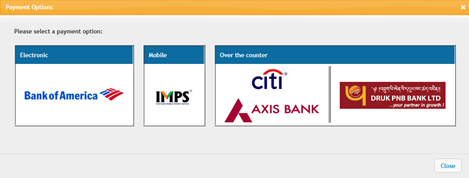
- Click on the “Citibank / Axis Bank” logo under the “Over the counter” section.
- A new browser window will open up with the “CASH PAYMENT OF US VISA FEES”. That is the CGI cash deposit slip.
Sample Cash Deposit Slip.
Take the print out of the customized deposit slip shown for you. Do not use the sample cash deposit slip shown here. - Visit any of the branches of Axis Bank or Citibank in India. You can pay the visa fees at any branch anywhere in the country, irrespective of the consulate your visa appointment will be at.
- Ask for the cash deposit slip at the bank. Fill it out completely.
Sample Cash Deposit Slip – Axis Bank
Sample Cash Deposit Slip – Citibank - Make the cash payment of the exact amount indicated on the deposit slip. The payment must be made in Indian Rupees (INR) and not in U.S. Dollars (USD), as shown.
- Once the bank receives your payment, they will give you a white-colored receipt.
Sample USA Visa Fee Payment Receipt
You will also get the stamped cash deposit slip for the cash you deposited.
Sample Axis Bank Payment Slip - Keep the fee payment receipt with you. You will need that receipt for scheduling the appointment. Carry that receipt as the proof of payment to the U.S. Embassy/Consulate interview.
Pay particular attention to the 10-digit “BANK REFERENCE NUMBER”. You will need that number for scheduling the appointment. That is also called the “Fee Receipt Number”.
Fee Receipt
The USA Visa Fee Receipt can be used to make an appointment within 1 year from the date of issue. The receipt is deemed as utilized once the interview has taken place and cannot be used to make a subsequent appointment. If you lose your Visa Fee Receipt, you must pay the fees again and get a new receipt. If you don’t schedule an interview within one year of the payment, your receipt will expire, and you will have to pay again for an interview in the future.
Scheduling an Appointment
The fee receipt gets activated within three hours of payment, made at any time during the business day. Do not attempt to take an appointment until then.
Once your receipt is activated, you will receive an email indicating so.
