

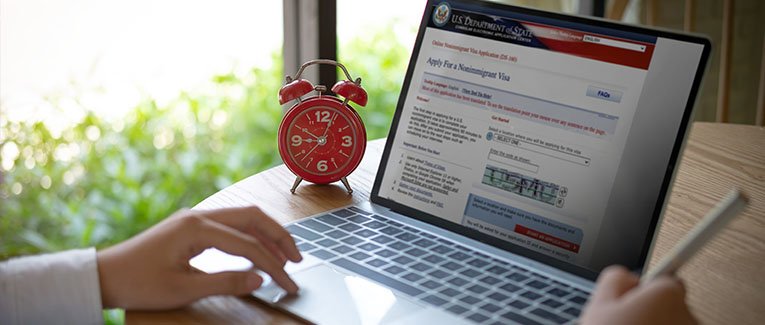
Form DS-160, the Online Nonimmigrant Visa Application, is used by individuals applying for most U.S. nonimmigrant visas, including visitor, student, exchange visitor, and temporary employment visas. It is also used for K fiancé(e) visas.
The questions displayed on the DS-160 may vary depending on your visa category and your answers to previous questions. Applicants should prepare their information and supporting documents before beginning the application.
Completing and submitting Form DS-160 is only one step in the visa application process. Applicants must also follow the applicable U.S. Embassy or Consulate instructions for paying the visa fee, scheduling an appointment, and submitting any required documents.
Even applicants who qualify for an interview waiver generally must complete Form DS-160.
Browser and Technical Requirements
Before starting your DS-160 application, make sure that:
- You have a stable internet connection.
- JavaScript is enabled in your browser.
- Your browser supports the security features required by the Consular Electronic Application Center (CEAC).
- You are using a current browser that works with the official application website.
- You have access to a printer or a device where you can securely save the confirmation page.
Browser compatibility guidance on government webpages may be outdated. If you experience technical difficulties, consult the current instructions on the official DS-160 application page.
Always access the application through the official U.S. Department of State website.
Tips for Completing Form DS-160
Accurate Information
Answer every question truthfully and completely. Make sure your answers are consistent with your passport, travel history, employment records, and other relevant documents.
- Enter all answers in English using English characters, except where the form specifically requests your full name in your native alphabet.
- Avoid accented characters in fields where the system does not support them. For example, enter “Munoz” instead of “Muñoz” when required by the form.
- Do not leave mandatory questions unanswered.
- Use the “Does Not Apply” option only when it is available and appropriate to your circumstances.
- Review your responses carefully before submitting the application.
Providing false, misleading, or incomplete information may delay processing or adversely affect your visa application.
Language Assistance
The DS-160 must be completed in English, except for fields that specifically request information in another alphabet.
Translated tooltips are available in various languages to help applicants understand the questions. You can generally select a preferred tooltip language from the options displayed on the application page.
Translations are provided for assistance. Your answers must still be entered in English.
If you need an interpreter during a visa interview, follow the specific instructions provided by the embassy or consulate where you will apply.
Application Review
Before electronically signing and submitting the form, review the information on the confirmation and review pages.
Check the following details carefully:
- Full name and passport information
- Date and place of birth
- Travel purpose and intended travel dates
- U.S. address and contact information
- Employment and educational history
- Previous U.S. travel and visa history
- Security and background questions
Correct any errors before submitting the application. The electronic signature certifies that the information provided is true and correct to the best of your knowledge and belief.
Confirmation Page
After submitting Form DS-160, print or securely save the confirmation page containing the barcode and application ID.
You generally do not need to print the entire DS-160 application for the interview. However, you must bring the confirmation page and follow any additional document instructions issued by the relevant embassy or consulate.
Keep a digital copy as a backup.
Public Computer Use
If you complete the application at a cybercafe, library, or other public computer:
- Do not allow the browser to save your password or other sensitive information.
- Save the application data only to a secure personal storage device, if necessary.
- Log out and delete downloaded files containing personal information.
- Clear any locally saved application data and browser history when finished.
Your passport details, travel history, and other information entered into the DS-160 are sensitive and should be protected.
Saving and Retrieving Your DS-160 Application
Application Timeout
For security reasons, the DS-160 may time out after a period of inactivity. Unsaved information may be lost.
Save your application regularly and avoid leaving it idle for extended periods.
Saving and Resuming Application
When you begin a new DS-160 application, note the Application ID displayed on the screen and retain the answer to your security question.
The system generally allows you to retrieve an unfinished application for up to 30 days using the Application ID.
If you need to resume the application after that period, you may be able to retrieve it using a previously saved application data file, provided the file remains accessible and the system permits retrieval.
Saving an Application Copy
Use the “Save” option available within the DS-160 application to download your application data file if you need to continue later.
The downloaded file is typically in a format intended for retrieval through the DS-160 system. It is not a regular document you can edit directly.
To continue a previously saved application, select the applicable option to retrieve a previous application or upload a saved application file on the official DS-160 website, then follow the instructions.
Saving your application can allow you to:
- Resume an unfinished application.
- Reduce the risk of losing information because of a timeout.
- Review previously entered information.
- Reuse information when appropriate for a future application.
A saved application is not a submitted application. You must complete the required fields, electronically sign the form, and submit it to obtain a confirmation page.
Changes After Submitting Form DS-160
Once you electronically submit Form DS-160, you generally cannot reopen the submitted application and edit its answers.
If you discover an error after submission, you may need to complete and submit a new DS-160. A new submission generates a new confirmation barcode.
Before proceeding, check the instructions of the embassy or consulate where you will apply and the applicable appointment service. Follow the required procedure for associating the new DS-160 confirmation number with your appointment.
Do not automatically cancel your appointment. The need to change or reschedule an appointment depends on the applicable post’s instructions and the nature of the error.
For a minor spelling error, contact the relevant embassy or consulate or follow its published guidance to determine if a corrected application is necessary. Do not assume that every error can be corrected at the interview.
Do not write corrections by hand on the DS-160 confirmation page as a substitute for following the official correction procedure.
Incorrect information may cause delays, require a new application, or affect the processing of your visa.
Required Documents for a U.S. Visa Appointment
Required documents depend on the visa category and the instructions issued by the embassy or consulate.
For a typical nonimmigrant visa appointment, applicants should prepare the following, as applicable:
- Valid passport: Current passport and previous passports, if relevant or requested.
- DS-160 confirmation page: Printed confirmation page with the barcode.
- Visa fee payment receipt: Payment receipt, if required by the appointment instructions.
- Appointment confirmation: Appointment confirmation or other required scheduling documentation.
- Photograph: Compliant digital photograph uploaded with the DS-160. If the upload fails, bring a printed photograph that meets the official specifications, following the embassy or consulate’s instructions.
Check the official website of the U.S. Embassy or Consulate where you will apply for any additional requirements.
Supporting Documents for a U.S. Visitor Visa
For B-1/B-2 visitor visa applicants, additional documents may support the purpose of the trip, the ability to pay for the visit, and the applicant’s circumstances outside the United States.
There is no universal supporting-document checklist that guarantees approval. Applicants should select documents relevant to their individual circumstances and intended travel.
Financial Documents
Depending on your situation, you may bring:
- Recent bank statements, such as statements covering the previous six months
- Income tax returns, where relevant
- Salary statements or other proof of income
- Fixed deposit statements, investment records, or other evidence of available funds
- Evidence showing who will pay for the trip
There is no universal requirement for every applicant to submit six months of bank statements or three years of tax returns. Bring evidence that reasonably supports your financial circumstances.
Employment and Business Documents
If employed:
- Employment verification letter stating your position and salary
- Recent payslips
- Approved leave letter, if applicable
- Other relevant employment records
If self-employed or a business owner:
- Business registration documents
- Business financial statements or tax records
- Partnership deed, if applicable
- Other evidence of ongoing business activities
Employment and business documents may provide context about your professional commitments and circumstances in your home country.
Property and Other Assets
Where relevant, applicants may bring:
- Property ownership documents
- Relevant investment or asset statements
- Loan or financial obligation documents
- A chartered accountant’s valuation report, if useful
Property ownership and financial assets may provide context about an applicant’s circumstances, but they do not independently establish eligibility for a visa.
Family and Social Ties
Depending on the applicant’s circumstances, relevant documents may include:
- Marriage certificate
- Children’s birth certificates or other relevant family records
- Evidence of family responsibilities or dependents
- Other documents demonstrating ongoing ties to the home country
Family photographs are generally supplementary rather than essential documents.
Previous Travel History
Applicants may bring:
- Previous passports
- Previous U.S. visas
- Relevant entry and exit stamps
- Evidence of previous international travel, if applicable
Travel history may provide context about previous trips and compliance with immigration requirements. Previous travel does not guarantee visa approval.
Sponsorship Documents
If another person will pay for some or all of your trip, relevant documents may include:
- An invitation letter, if useful
- Evidence of the relationship between the applicant and sponsor
- The sponsor’s financial documents, if needed
- Information explaining who will cover travel and living expenses
For a B-1/B-2 visitor visa, a letter of invitation or Affidavit of Support is not a mandatory requirement. Sponsorship does not eliminate the applicant’s responsibility to establish eligibility for the visa.
The consular officer evaluates the applicant’s individual circumstances and the applicable legal requirements.
Important Reminders
- Complete Form DS-160 accurately and truthfully.
- Use the official CEAC website to complete and submit your application.
- Save your Application ID and unfinished application data securely.
- Review every answer before electronically signing and submitting the form.
- Print and keep the DS-160 confirmation page with its barcode.
- Follow the appointment and document instructions for the specific embassy or consulate where you will apply.
- Carry supporting documents relevant to your visa category and personal circumstances.
- Do not assume that submitting more documents guarantees visa approval.
For visitor visas, the U.S. Department of State explains that applicants must qualify based on their own circumstances and ties abroad. Financial documents, employment records, family ties, and other evidence should support the applicant’s individual case rather than be treated as a mandatory checklist for every applicant.